Other images at the bottom of this post.
Since visiting Salute Zero Five last April (2005), I’ve spent most of my free time learning the art of painting miniatures from 10mm to 40mm and after many months of trial and error (and error), believe I’m ready to show my work offering some tips and advice along the way.
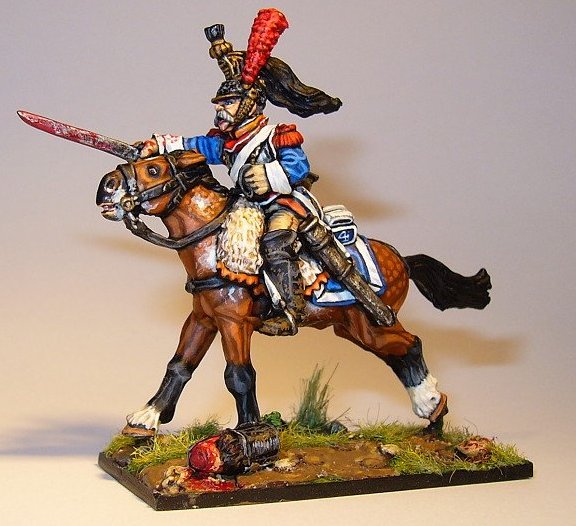
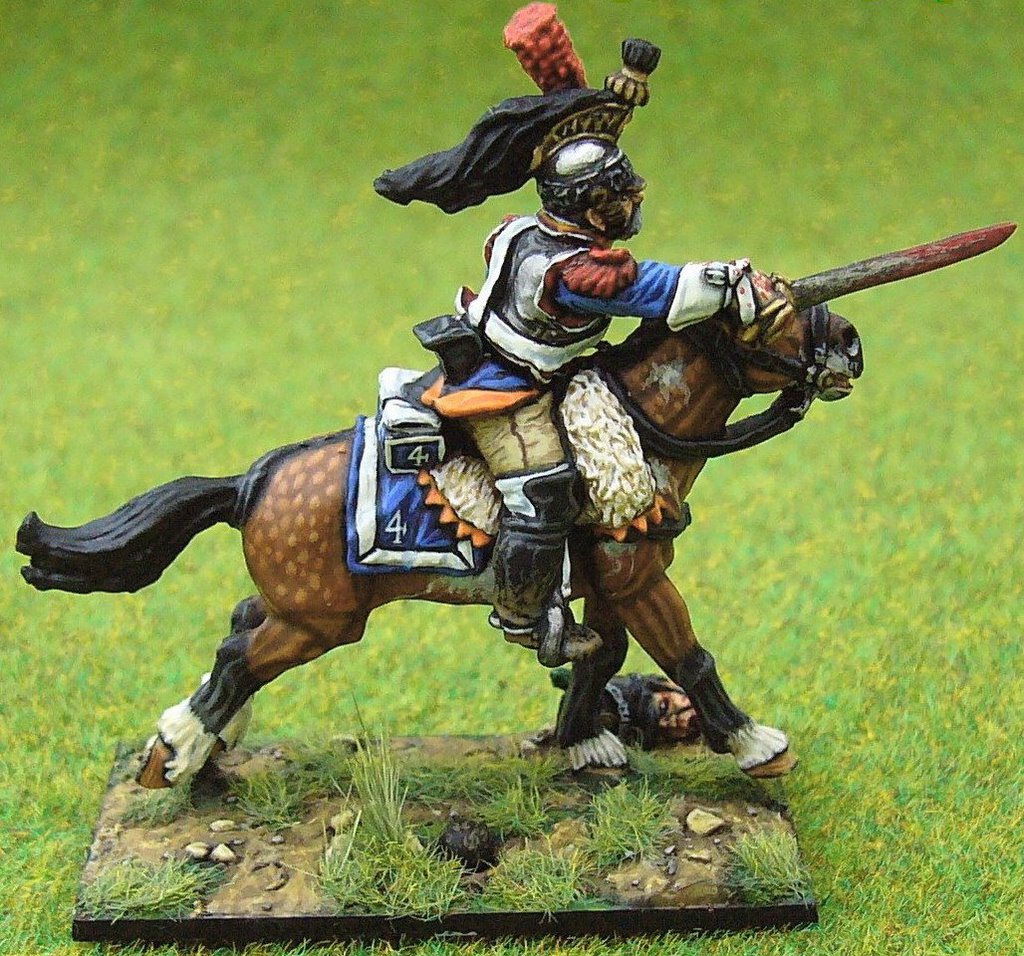
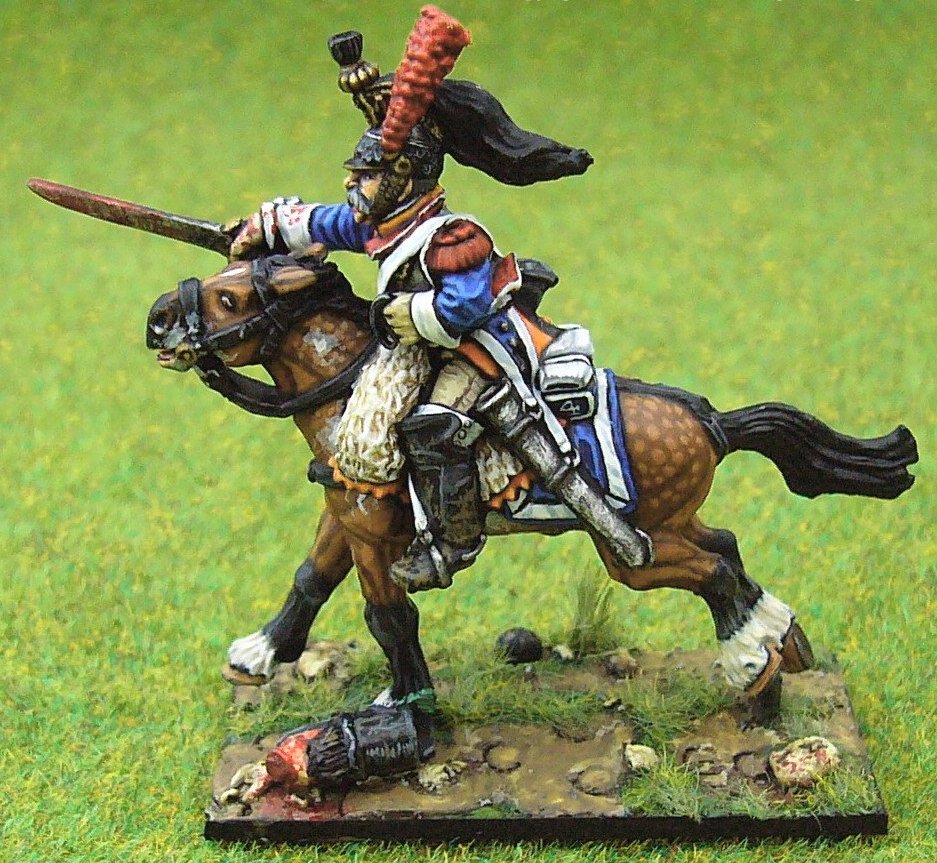
In WORKBENCH #1, I have featured a French Napoleonic Cuirassier from Foundry, in my view one of the best manufacturers of 28mm miniatures around. This figure is a trooper from the 4th Cuirassier Regiment, attached to the 13th Cavalry Division of Napoleon's Armée du Nord that took part in the massed cavalry charge at 3.30pm on 18th June 1815 at The Battle of Waterloo and one that makes me particularly proud.
Here's a brief description of how I acheived the finished result.
Step 1: Preparing the Figure
Firstly I removed all the excess metal (often referred to as Flash) from the figure, which in the case of all Foundry miniatures is fairly negligible. To do this I used a scalpel and small file to smooth down any uneven bumps. Then I applied an undercoat of Humbrol Matt Black (Matt 33) slightly diluted with thinner in order not to lose definition.
Step 2: Painting Stage
To paint the figure, I sourced the best reference material around – vital if you want to attain accuracy. In this case, and for other avid fans of the Napoleonic era, check out my “Uniform links” – possibly the best examples of Napoleonic uniforms on the web. Unlike most professional painters who recommend Foundry or Vallejo paints, I use paints from the Games Workshop, which seem to do a good enough job for me. The main reason being there’s a shop close by! As for a paint brush, I have tried many and am generally never satisfied. My current preference is the 2/0 Pro Arte Prolene brush. My painting method is an amalgam of my own style (which is still evolving) coupled with the painting tips from some of the best painters around (see my links) and months of hard practice. (I will post an article that will deal with PAINTING TECHNIQUES in the near future). In brief, I generally use three different shades of the same colour to achieve tone and shading by applying a base coat (the darkest shade), a mid-tone and finally a highlight painted inside the mid-tone (i.e. the lightest version of the same colour).
Painting Horses
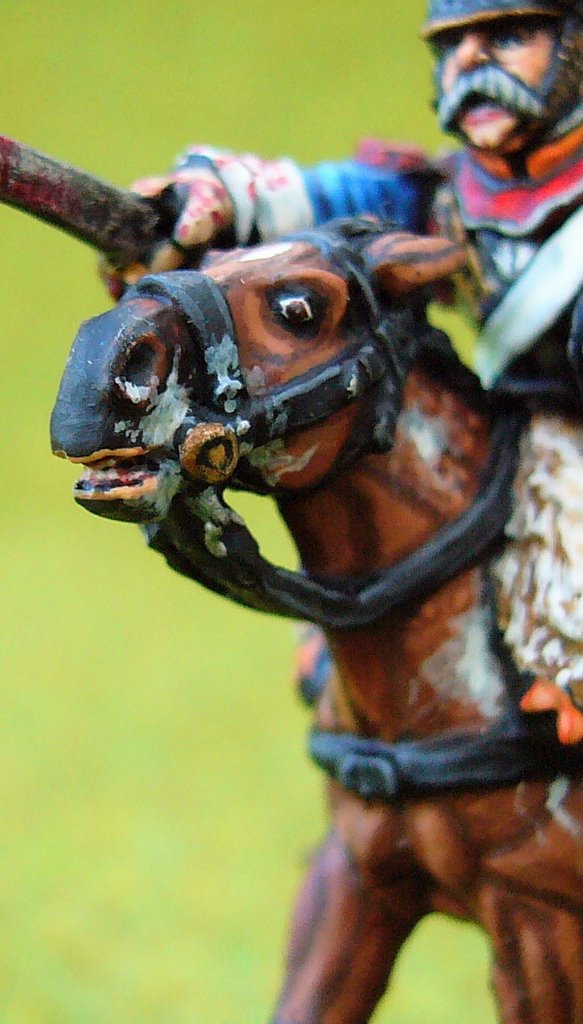
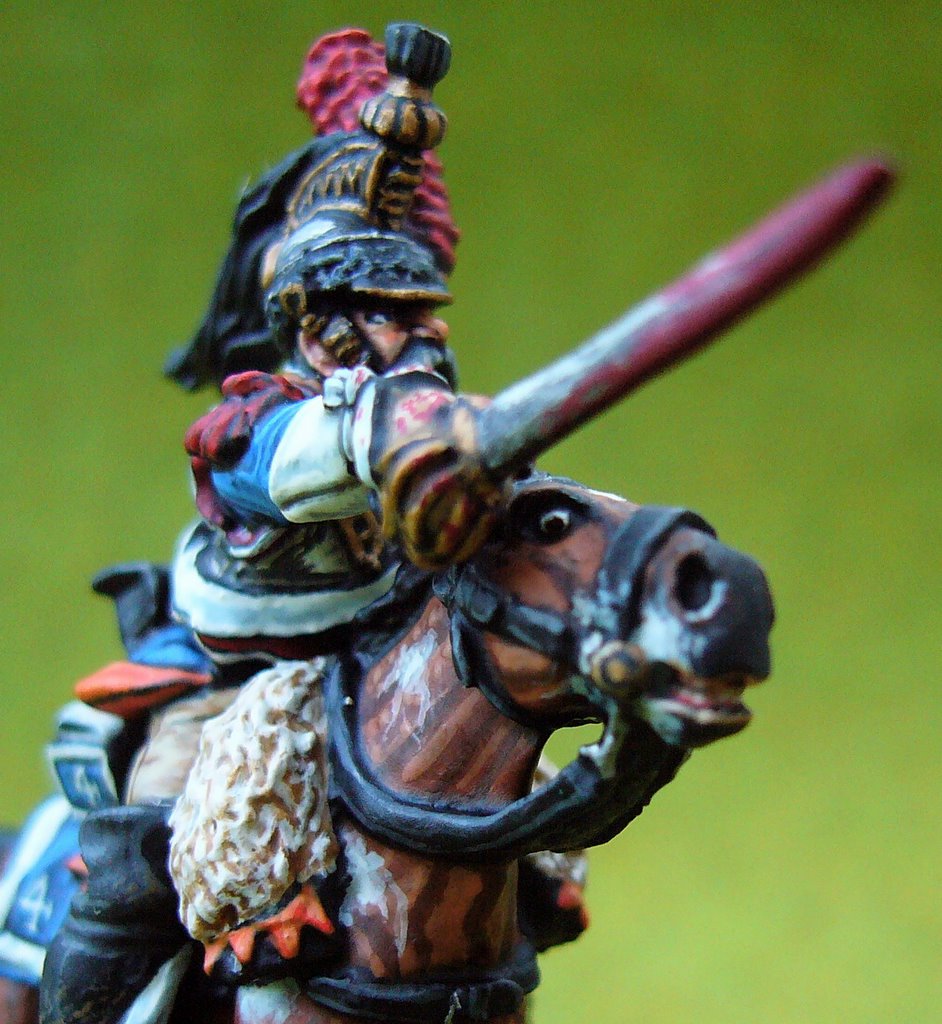
This is not to be undertaken for the fainthearted. Again I must recommend a brilliant web site that I found – Horse Power Graphics Inc (USA) that provides an amazing resource of beautifully painted horses for reference. Click on Painted Horse Gallery to view examples. I will also post a step-by-step guide to painting horses (with pix) in the near future. UPDATE: The Horses Eyes - To get the mcrazed look, I simply painted a blob of black in the centre of the white of the horses eye making sure that the black didn't touch any part of the eyelid - hey presto - one crazed manic horse!
Step 3: Varnishing
Once I’d finished painting the figure, I applied a coat of Humbrol clear gloss varnish (Gloss 35) and left to dry for 24 hours before applying a coat of Blackfriars Clear Varnish Matt P101 – simply the best varnish around. Warning: Do be very careful when using this matt varnish as you can’t use it straight away. You must leave it for at least one month upside down to allow thick goop to separate and settle on the underside of the lid. Then mix this goop with thinner and paint it on a spare painted figure to check you have the right consistency…and when you do, the result is awesome!
Step 4: Basing
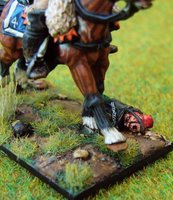
I used a 2mm thick black plastic sheet that you can get from any modelling shop and cut it to the required size. I then used Airclay – air drying modelling clay reinforced with nylon fibres for extra strength, which I applied to the base using a tooth pick to press down and sculpt accordingly. Once dry, I painted patches of PVA glue to the base and then covered with fine sand before applying paint… and just in case you were wondering, the severed head is from a decapitated 25mm Old Glory British Napoleonic infantryman (Light Company)… and YES, I do love applying detail.
UPDATE: The Decapitated Head
Thanks for all the comments regarding the decapitated British infantryman and to clear matters up, let me say it was done to add a bit of macabre fun. That some think my Cuirassier was responsible is an interestingthought but not one I was trying to conjure. For the record, let's imagine a light cavalry regiment is ahead of our squadron of Cuirassiers and was ultimately responsible. As for Cuirassiers decapitating infantrymen, I'm sure it occured despite the fact heavy cavalry swords were heavy and cumbersome. As many know, French cavalry were renowned for conducting charges at a trot or even a walk (strange as it sounds). This was particularly true for the heavy cavalry. As to the argument of cut or thrust? – Well, if a heavy cavalryman is simply attacking at a trot, I'm sure the cut was used especially if the trooper was similar in size and strength to our dear friend Sharpe of the Rifles - a sworn fan of the heavy cavalry sword & also known for his unorthodox use of the weapon.
JC
28 January 2006
Here are some other pix of the Cuirassier showing a bit of the detail I so enjoy. The photos were taken by me using a Panasonic Lumix 4.0 Mega Pixel digital camera (Camera settings: Macro / White Balance - Auto / Sensitivity - 200ASA / Picture Size - 2304 / Quality - Fine / AF Mode - Fine / Slow Shutter -0.5 (minus half) / Picture - Vivid).
[Click on the photo to view full-size image].


COMMENTS: I welcome all comments.


1 comment:
Truly inspiring work. Do you paint commissions?
Post a Comment